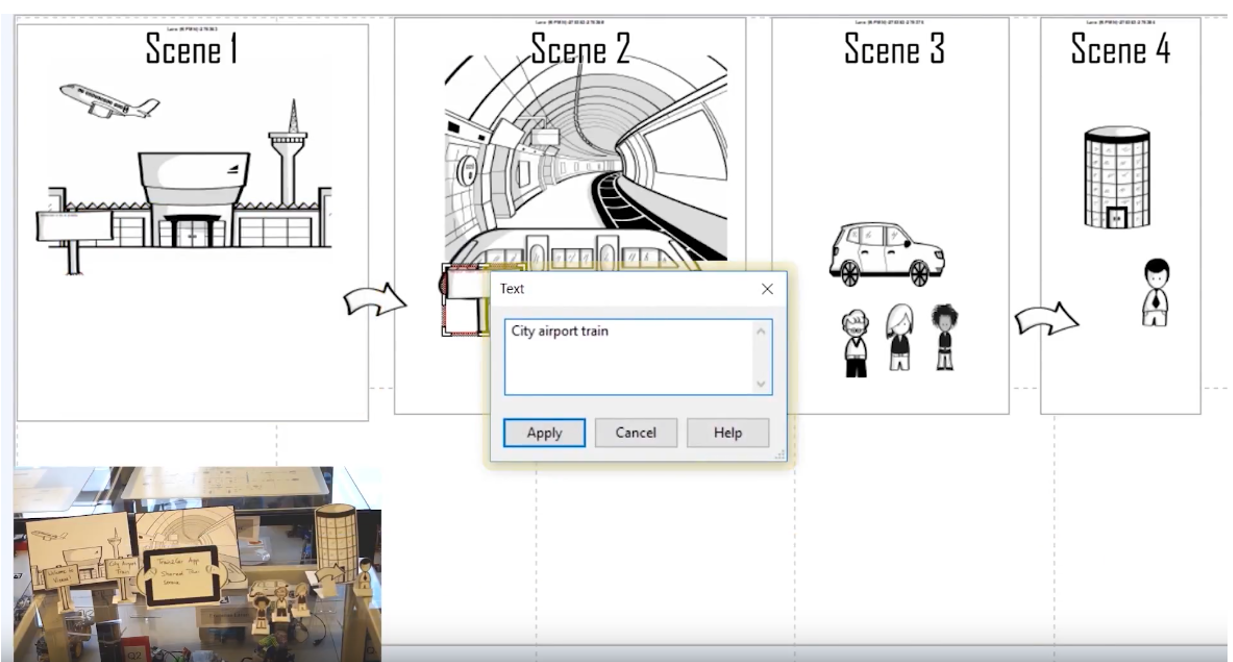
Orodje Scene2Model
STATISTIKA
Predlagani čas
30-60 min (da samodejno prenesete in obogatite prizore, ki ste jih postavili s fizičnimi figurami)
Raven težavnosti
lahka
Udeleženci
ekipa (3-7 oseb)
Materiali
papirnate figure iz prizorov SAP, značke, miza s prosojno površino iz stekla ali plastike, spletna kamera, prenosnik ali namizni računalnik, program Scene2Model in navodila za njegovo namestitev
Predloge/Izpisi

Opis:
Slikovne zgodbe so ena izmed tehnik za prototipiranje, pri kateri so ključne točke prikazane kot prizori, pri čemer se uporabljajo materiali, kot so med drugim kartonske figure ali stripi. Namen omenjene tehnike je zbiranje in izboljševanje zamisli ter natančno pojasniti, kako predvidoma bo produkt/storitev prinesla dodano vrednost v specifičnem kontekstu in kakšen je tok informacij.
Cilj orodja Scene2Model je:
- Avtomatizirati preslikavo haptičnega orodja za prototipiranje prizorov SAP in omogočiti uporabnikom, da upodobijo svoje inovativne zamisli v digitalnem okolju, kjer lahko:
- obogatijo zamisli (slikovne zgodbe) s podrobnejšimi lastnostmi in informacijami (npr. interakcijske točke poslovnih procesov, ki upodabljajo specifične vrednosti točk podjetja),
- spremeniti in shraniti slikovne zgodbe in
- omogočiti, da slikovne zgodbe dobijo drugi člani ekipe in jih izpopolnijo.
- Zagotoviti okolje za digitalno oblikovanje, ki naslavlja pomembne vidike oblikovalskega mišljenja (design thinking) in ga lahko podjetja prenesejo brezplačno in uporabijo za preizkušanje svojih inovativnih zamisli tako, da jih povežejo s poslovnimi procesi ali drugimi podjetju specifičnimi artefakti.
Faze:
PRVA MOŽNOST: Kombiniranje haptičnih prizorov SAP in orodja Scene2Model
Priprava (potrebna je zgolj enkrat): natisnite figure prizorov SAP, prilepite značke orodja Scene2Model s figurami, pripravite mizo in nastavite spletno kamero.
Delavnica:
- Postavite elemente v različne prizore skladno z vašim scenarijem.
- Samodejno uvozite vsak prizor (ali več prizorov) v orodje.
- Obogatite/spremenite prizore z lastnostmi/grafičnimi elementi itd, samodejno generirajte slikovne zgodbe in jih povežite s poslovnimi procesi.
- Če želite, prenesite model ali grafike v vaš zasebni profil tukaj na portalu DIGITRANS, da jih boste lahko delili z vašo ekipo in zainteresiranimi stranmi
DRUGA MOŽNOST: Prototipiranje direktno v orodje Scene2Model
Priprava (potrebna je zgolj enkrat): prenesite in namestite orodje Scene2Model od OMiLAB, dostopno na http://austria.omilab.org/psm/exploreprojects?param=explore.
Delavnica:
- Modelirajte prizore skladno s problemsko domeno, ki jo želite rešiti, in vključite vse potrebne informacije.
- Če želite, prenesite model ali grafike v vaš zasebni profil tukaj na portalu DIGITRANS, da jih boste lahko delili z vašo ekipo in zainteresiranimi stranmi.
Nadaljnje branje
- orodje Scene2Model
- posnetek z navodili za delo z orodjem Scene2Model: https://www.youtube.com/watch?v=kQoQtEME_ss&feature=youtu.be